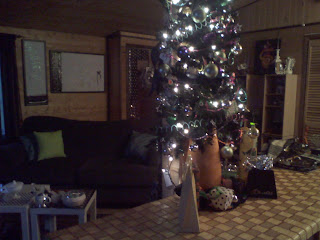
With every ones budgets so tight this year, I decided to see if it was possible to go to the Dollar General store,With $25.00 and find enough things to decorate a 5 1/2 foot tree. A BEAUTIFUL TREE MIND YOU ! Not knowing what I would find. And knowing me , I didn't want to just use the ready made decorations. So, here is what I bought at the store . oh, by the way I think I went over budget by .68 cents! This is a pic of what I had at home that inspired the color theme. Sharing 36 photo's total.
Receipt was for $25.68 shown at end.

 Up close of what we bought. The throw was $5.00/ used to cover the backs of pillows. We also bought a bag of Slinky's,2 bags hearts,2 package bracelets,2 bags bling rings,2 bags mini star wands,2 package necklaces,4 different ribbons . Below also rapping paper already had to go with the theme.
 Above right-I put the tree into a vase,on our counter. The colors bought at the store, where , Almost neon -pastels,pink,green,purple,yellow,blue,orange. That's why I choose the color of the vase. Now I'll also share the rest of the rooms .
So, I just spread little bits of the greens,blues,orange around. Just enough for the eye to tell the mind, it works.
These rooms adjoin each other.
Now, this is art that hangs on our wall , but It didn't go very well ,with every thing going on. So I drew the bulbs,colored them lightly with colored pencil's, then took a glue stick and just did a scribble continuous line and dusted with glitter. Now my paper was shorter than the frame so I finished it off with black wrapping paper and joined the two with a piece of glitter ribbon. I did two of these ,the other one is a tree with bulbs,
Tied bulbs on curtain rods with black ribbon over top of a black curtain drape of x-ray tree's of black,white,silver, found this fabric at ghoul's.
Spread some more black and silver around.
Don't be afraid of mixing poka-dots and plaids and trees and what ever you have.
Add some more color.
The tree .... TURNED OUT BEAUTIFULLY.
see below
more pic's below
The black,white ,silver, went very well with the other colors. more pic's below
Soooo pretty !
up close.
It's hard to believe this tree was done with $1.00 items, cause it looks like a million. see other pic's below.
Love these colors.
Always add a bit of unexpected.
I want to wish everyone reading this blog, Happy Holidays ! And I will be getting back with everyone soon. BE SAFE. May we all find just what we need, under our Trees. Till then.......


